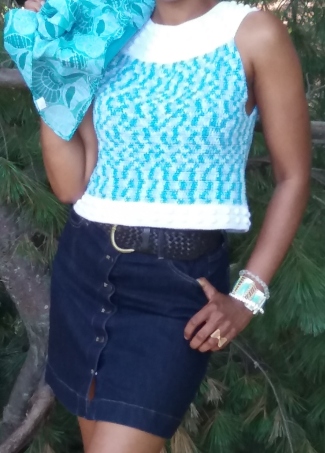
My Version of the Taraval Tank Top

Taraval tank top in Blue Ice colorway with white bobble stitch collar and hem.

Taraval-ish

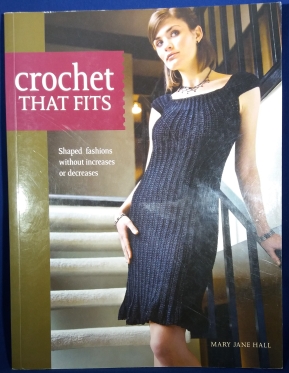
Sooner, rather than later, I will write a full review of the book “21 Crochet Tunics and Tank Tops” but, tldr: the designs are really cute but the patterns are terribly written. So at first I had a pretty hard time trying to follow the pattern for this top. Eventually, I all but gave up on the pattern and modified the heck out of it.

Close up of white Bobble stitch collar with rounded neckline.

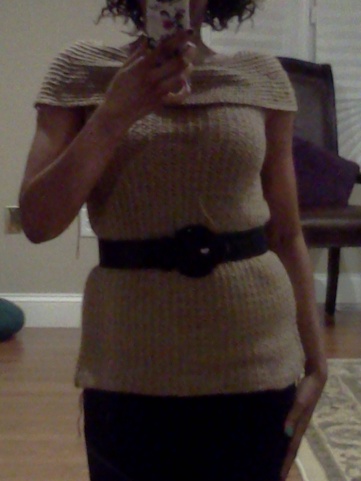
Bobble stitch collar.

For starters, I shortened the length of the collar. The pattern called for a 28” collar, which was just to too ridiculously big. I chopped four inches off of that, and I think I could taken off an inch or two more. By dropping a specific number of pattern repeats, I was still able to follow the instructions for the collar so I could increase, while still keeping my bobbles aligned vertically.

Next, I had to figure out the increases in the body on my own because the pattern only increases in the very first row, the row that connects the body to the collar. After that, every row is supposed to have the same number of stitches. Yes, without increases the body will spread a little as you make it longer but, in my case, it didn’t spread enough for me to avoid showing an obscene amount of side-boob. I ended up increasing every other row, from the neck to under the arms. (When I say “ended up,” I mean I messed up my increases the first time and had to rip out the entire front, and make it again.)

Close up of linked double crochet stitch

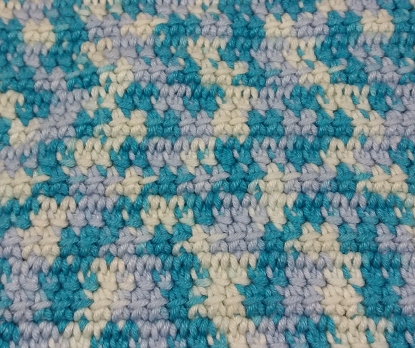
Linked double crochet is a great closed weave stitch.

Then I changed the pattern stitch. The original pattern calls for alternating rows of single and double crochet. But that creates a very open weave that will either require a lining, or that will require something be worn underneath the top. So I, instead, opted for the linked double crochet stitch, which I had just learned from a Craftsy class. That gave me a nice closed weave, making for an opaque fabric.

Close up of bobble stitch hem.

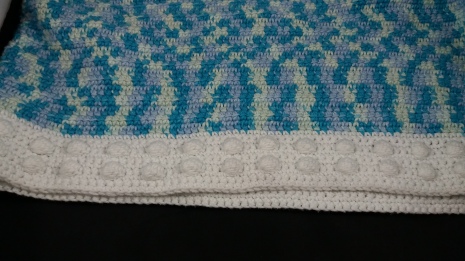
I decided to repeat the bobble stitch design at the hem.

Lastly, I added the rows of bobble stitch to the hem. Because I changed the color story from the largely monochromatic one depicted in the book, I felt like duplicating the white bobbles on the bottom of the shirt made the collar make a little more sense. I also shortened the shirt, making it waist-length because I was so over this pattern, I just wanted to be done with it. I’ll mostly wear it with high-waisted bottoms to keep my tummy covered.

Ball of Cotton Fair yarn in the blue ice colorway

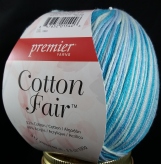
My new favorite yarn: Cotton Fair by Premier Yarns

The only thing that I took directly from the pattern was the yarn selection. Several of the designs in this book, including this one, are made with Premier Cotton Fair yarn. Cotton Fair is 52% cotton and 48% acrylic, and comes in 317yd skeins for between $4.99 and $5.99 each, depending on where you buy it. It’s a sport weight yarn that wears very comfortably. It’s also machine washable so your garments will be easy to care for. (I am so not down with those high maintenance, hand wash only yarns.) I used the colors white and blue ice.

When all was said and done, I ended up with a top that I am pretty happy with. But there are always things you wish you’d have done differently and I see me making this top again, at some point, with a few changes in mind.

A Slightly Less Sweater-y “Sweater Bag”

redbag1

If you follow me on Instagram, you know I got a great deal on some Isaac Mizrahi craft yarn. If you don’t know, every so often, Michael’s will throw together whatever odds and ends they have floating around the store and, more or less randomly, pack them into large bags that are sold for four dollars each. I’m usually able to ignore the siren song of the $4 Grab Bag, but when I spied one that contained a fair amount of yarn I, of course, went all grabby-hands on it.

I decided to make some sort of small accessory for two reasons: 1 – There just wasn’t that much of each kind of yarn in the bag, and 2 – the yarn, especially that red one, is kind of scratchy, so I wouldn’t use it to make a garment. All of the yarn is Isaac Mizrahi Craft by Premier yarns. The one I used for this bag is called University, which comes in 157 yard skeins of worsted weight yarn, containing 40% acrylic, 31% superwash wool, and 29% polyamide. I found the yarn easy to work with and in the two-and-change skeins it took me to make this bag, there were no knots in the yarn. I looked up all of my Grab Bag yarns online and they usually sell for $6.99 a skein so I got it for a steal, especially since I don’t think this a yarn I would have been interested in buying at full price.

Crochet That Fits book cover

The Sweater Bag Pattern is on page 62.

The pattern I used is from the book Crochet That Fits by Mary Jane Hall, and the Sweater Bag pattern is found on page 62. All of the patterns in this book do shaping without any increases or decreases. This bag just alternates between single crochet and double crochet stitches to make the bag widen or narrow as needed. The pattern actually calls for a bulky yarn but I found the Mizrahi yarn to be on the bulkier side of worsted so it worked great. The bag works up really quickly; I was able to do all the crochet in one day, and all the sewing the next.

I changed the pattern stitch from back-loop-only to front-loop-only because I think ribbing with double crochet, as opposed to single, can look a little too clunky.  The side-by-side photos show the bag in the original pattern stitch as depicted in the book (left), and a close-up of the pattern stitch I actually used (right). While I knew I would get a look that is, overall, less sweater-y, I also knew it would give me those lovely vertical ribbed stripes every other row.

Inside-out bag showing the bronze-colored organza lining.

Inside-out

The hand stitched lining uses some organza I had lying around. I was lucky to already have something is this color as I think it complements the metallic threads in the yarn really nicely. The bamboo handles were donated by my mom. If I had it to do over again, I would not have wrapped the yarn around the handle so many times. It actually prevents the mouth of the bag from stretching as much as it would otherwise, so the bag doesn’t open as widely as it could. Live and learn.

I have to say, I’m not super in love with the Mizrahi yarn, but for four dollars, I’m not mad either. This was a fun, quick make, and I think this bag will fit very nicely into my wardrobe.


An Introduction

Selfie of me wearing a beige off-the-shoulder crochet sweater, cinched at the waist with a black belt.

An early attempt at garment making, complete with hanging threads. lol

togs, n. : clothing; especially: a set of clothes and accessories for a specified use, e.g. riding togs (source: Merriam-Webster.com)

Hi, I’m Cryss and that picture you see is of me wearing one of the first crochet garments I’d ever made. As you can see, I still had some ends to weave in. 🙂 It’s not a particularly exciting sweater, but I was very excited to wear it. It meant that I could make something to wear that was actually fit to see the light of day.

I’ve been a crocheter since my grandmother first handed me a hook when I was five years old, and I’ve been crocheting off-and-on ever since. Well, truthfully, much more off than on until about eight, or so, years ago. It took me a while to get back into the swing of things but, before long I was handing out crocheted scarves like Halloween candy.

But I got bored. I wanted to make something that wasn’t a rectangle. I wanted to make something that covered more than just my neck. I wanted to make capital “C” Clothes. That was a big deal for me because, at the time, it seemed like a task so far beyond the scope of my abilities. And at first, I was really bad at it.

Fast forward to that beige sweater you see in the terrible photo at the top of this post. I wove in those ends, pulled on a pair of jeans, and oh-so-proudly wore it to my family’s Thanksgiving dinner (to much ooh-ing and ahh-ing, I might add).

I like to think I’ve come a long way since then. But you can see for yourself by following me on my blog http://www.crochettogs.com and on Instagram @crochettogs. I’m looking forward to sharing my journey as I try to build a crochet wardrobe, one stitch at a time.